MXML – Macromedia eXtensible Markup Language (sometime referred as mobile extensible markup language, which is wrong) is an XML based markup language used in Adobe Flex for defining the user interface. MXML is primarily used in combination with ActionScript to develop RIAs on the Flex platform. MXML is primarily used for deploy business logic and internet application behaviours. It usually might constitute within it chunks of ActionScript code, either when creating the body of an event handler function, or with data binding where the curly braces ({) syntax is used.
MXML on Flex server is dynamically compiled into a standard binary SWF file as with most Flash files. However, the Adobe Flash Builder IDE and the free Flex SDK also allow you to compile MXML into SWF files without the use of a Flex server. Therefore, MXML can be considered as a proprietary standard due to the face that it is tightly integrated with Adobe Technologies only. Hence no formally published translators exist for converting an MXML document to another user interface language such as UIML, XUL, XForms, XAML or SVG. None the less there are a few third party vendor plugins that are available for Flash Builder 4.5 which let you generate a result other than in an SWF file.
Creating a UI with MXML
One of the biggest features of the Flex 4.5 SDK is its ability to define the visual controls’ appearance with programmable skins. Skinning and the concept of programming a component’s visual appearance, isn’t new to Flex. In its previous versions, you could create your own skins as a new ActionScript class. All you need to do is override certain methods that are called during runtime from the Flex framework and use the Flash drawing application programming interface to declare vector graphics. With this, you can create an entire visual presentation without ever using software such as Adobe Photoshop and Illustrator to draw interfaces. But against luck, this feature is so cumbersome and way too slow, also Photoshop can’t interpret ActionScript code to let you preview results, and effectively you’d have to do some serious planning on how to code the image you intend to create. To ease this, Adobe introduced the FXG language to help solve this particular programming hassle. FXG, or Flash XML Graphics, is a graphics interchange file format based on XML that lets you define low level vector graphics and specific attention is paid to how flash player renders graphics.
There are two versions of FXG specifications: versions 1 and 2. Starting with creative suit 4, Adobe graphical authoring tools (Illustrator, Photoshop, Fireworks) were able to import and export FXG files, In Creative Suit 4 (CS4), these software products work with FXG version 1, while CS5 versions of these applications and the FLEX 4.5 SDK supports both versions 1 and 2. You can define a vector graphic in text files with an FXG extension, or as an MXML based declaration of ActionScript objects that are based on a set of classes. In either case, the graphics are rendered by Flash Player at runtime and are dependent on Flash Player’s graphical rendering capabilities.
Before writing any code in MXML you need to follow some syntax behavior for your all MXML applications, these are the starting lines of code which you need to start with:
<?xml version=”1.0″ encoding=”utf-8″?>
<!– fxg/SimpleRectExample.mxml –>
<s:Application
xmlns:fx=”http://ns.adobe.com/mxml/2009″
xmlns:mx=”library://ns.adobe.com/flex/mx”
xmlns:s=”library://ns.adobe.com/flex/spark”
xmlns:comps=”comps.*”>
</s:Application>
All the lines of code should be within <s:Application></s:Application> tags.
Drawing Lines & Shapes
In an FXG, you can simply draw a shape by declaring an element with its name and then setting its required attributes. The FXG specification has the following elements defined:
<Graphic>
<Ellipse>
<Line>
<Path>
<Rect>
To accomplish the same thing in MXML, the Flex 4.5 SDK includes a package named spark.primitives. This package contains the following ActionScript classes that you can use to declare vector graphics.
Ellipse – Draws an elliptical shape. If its height and width are identical, it draws a circle.
Line – Draws a straight line from one set of coordinate to another set.
Path – Draws a shape based on a set of drawing commands, creating multiple shape segments.
Rect – Draws a rectangular shape. If its height and width are same, it draws a square.
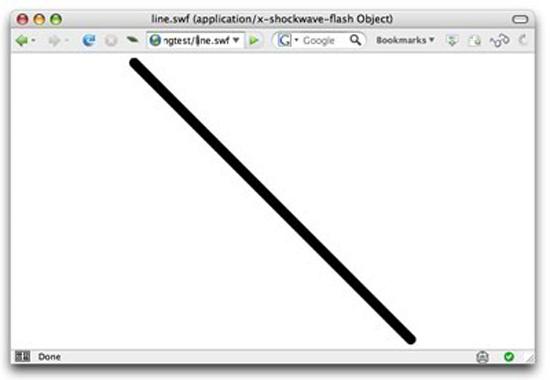
Following is an example for drawing a line and setting its attributes:
<s:Line width=”700”>
<s:stroke>
<s:SolidColorStroke color=”#000000” weight=”2” />
</s:stroke>
</s:Line>
The line class draws a line on the screen. As with all such primitives, it must be places within a Spark application or component. Its width and height properties determine its horizontal and vertical length while the stroke property determines its color and style. The stroke property must be set to an instance of a class that implements the IStroke interface. Examples of such classes in the Flex 4.5 SDK include GradientStroke and SolidColorStroke.
As with the fill property used with shapes that are drawn with the Rect, Ellipse and Path classes, the stroke property can be set to a gradient of two or more colors with the GradientStroke class or with one of its Subclasses, LinearGradientStroke and RadialGradientStroke. The gradient stroke classes support a property named entries that’s set to an array of two or more instances of the GradientEntry class. The following lines of code draw a horizontal line that’s 10 pixels wide and has three entries:
<s:Line width=”700”>
<s:stroke>
<s:LinearGradientStroke weight=”10” />
<s:entries>
<s:GradientEntryColor=”#000000”>>
<s:GradientEntryColor=”#ffffff”>
<s:GradientEntryColor=”#000000”>
</s:entries>
</s:LinearGradientStroke>
</s:stroke>
</s:Line>
The resulting line will have alternating black and white color of shades.
Drawing Rectangular and Elliptical Shapes
The two most commonly used and primitive vector graphic classes are Rect and Ellipse. Both support fill and stroke properties, which enable you to define the outer border and inner fill of the shape you’re drawing. Each shape’s fill property can be set to an instance of a class that implements the IFill interface. As described in the previous paragraph on the line class, each shape’s stroke property is set to an instance of a class that implements the IStroke interface. The following MXML code defines a rectangle with dimensions of 400 pixels width by 300 pixels height. The rectangle’s outer border is a solid black line with a weight of 2 pixels, and the fill is a solid light gray:
<s:Rect width=”400” height=”300” horizontalCenter=”0” verticalCenter=”0”>
<s:fill>
<s:SolidColorStroke=”#EEEEEE”/>
</s:fill>
<s:stroke>
<s:SolidColorStroke color=”#000000” weight=”2” />
</s:stroke>
</s:Rect>
Rectangular shape with round corners:
<s:Rect height=”100″ width=”200″ radiusX=”25″ radiusY=”25″>
<s:stroke>
<s:SolidColorStroke color=”#000000″ weight=”2″/>
</s:stroke>
<s:fill>
<s:RadialGradient>
<s:GradientEntry color=”0x0056FF” ratio=”0″ alpha=”.5″/>
<s:GradientEntry color=”0x00CC99″ ratio=”.33″ alpha=”.5″/>
<s:GradientEntry color=”0xECEC21″ ratio=”.66″ alpha=”.5″/>
</s:RadialGradient>
</s:fill>
</s:Rect>
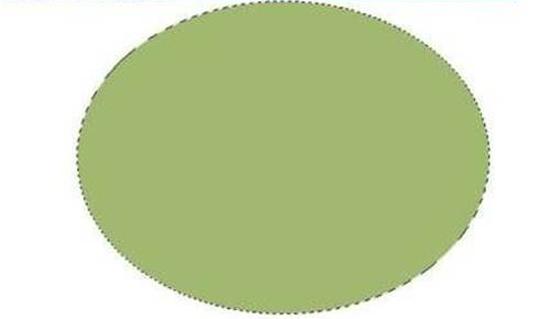
Following code can be used to draw a simple circle with the Ellipse class:
<s:Ellipse height=”200″ width=”200″>
<s:stroke>
<s:fill>
<s:SolidColorStroke=”#A3B772”/>
</s:fill>
</s:stroke>
</s:Ellipse>
In the next part of this guide we will learn about the arbitrary shapes, visual effects, gradient fill and filters etc. So keep looking back at Blogger’s Path for some interesting guides and tutorials.


